Azure Key Vault
This tutorial explains how to setup a KES Server to use Azure Key Vault as the persistent key store:
Azure Key Vault
Azure Key Vault is a managed KMS service that provides a secret store that can be used by KES.
As an external application, you must register KES in Azure Active Directory and have client credentials to store and access secrets in Azure Key Vault.
-
Active Directory Service
-
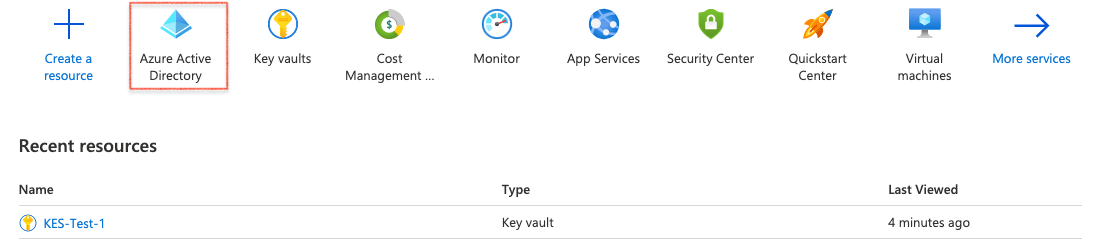
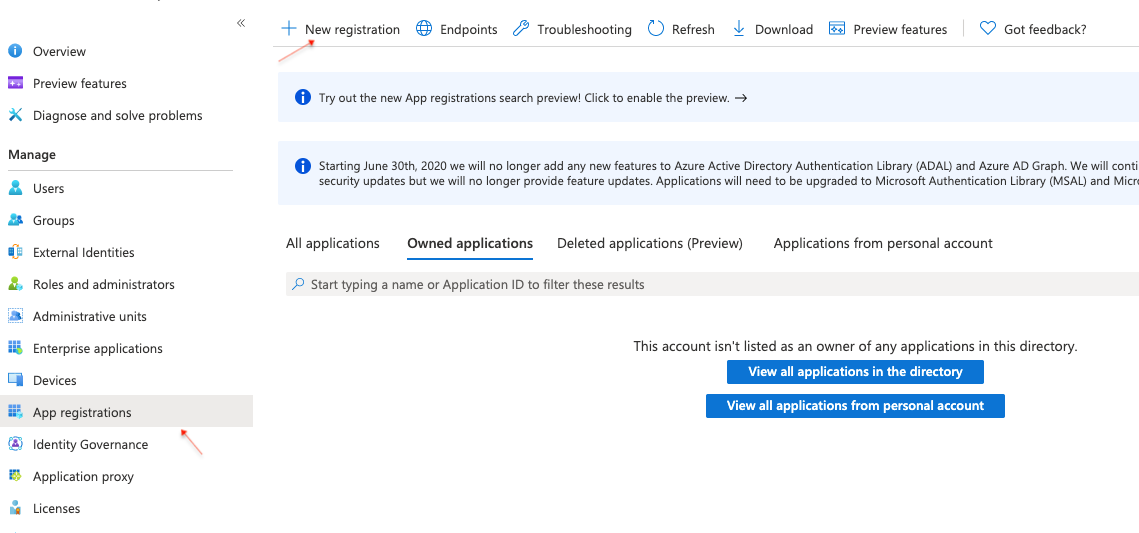
Navigate to Azure Active Directory and select App registrations.
-
Select New registration
-
-
Register KES App
Give the application a name, such as
KES-Demo, and register it. Once completed, Azure will show you some details about your newly registered application.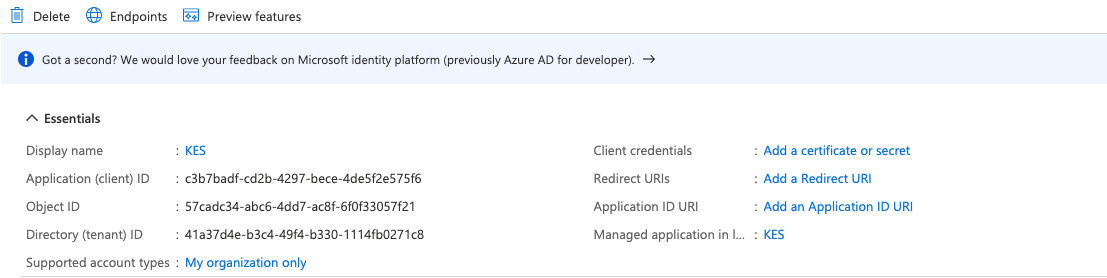
Take note of the following fields to use later:
- Application (client) ID
- Directory (tenant) ID
These fields contain universally unique identifiers (UUIDs), similar to
c3b7badf-cd2b-4297-bece-4de5f2e575f6. -
Create Client Secret
- Select Add a certificate or secret
- Assign a name, such as
KES-Demo - Select an expiration
Azure creates a new secret with the chosen description and expiry. This secret is required by KES to authenticate to Azure Key Vault.
Make sure to copy the secret value. It may not be shown again.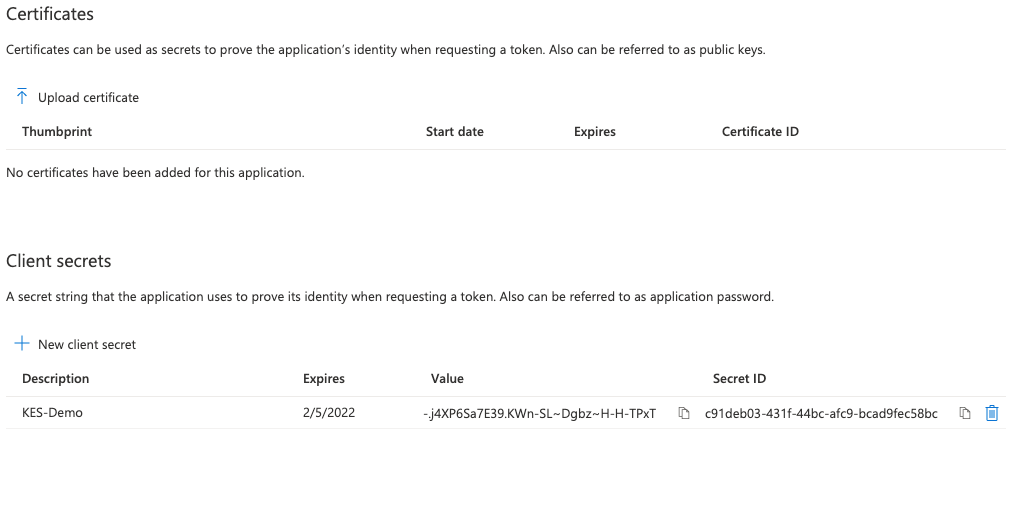
-
Application Summary
Navigate back to the application overview, and check that Azure shows that the application has one secret.

You should have the following information:
-
Application (client) ID
In our example images,
c3b7badf-cd2b-4297-bece-4de5f2e575f6. -
Directory (tenant) ID
In our example images,
41a37d4e-b3c4-49f4-b330-1114fb0271c8. -
The value of the newly created secret
In our example images,
-.j4XP6Sa7E39.KWn-SL~Dgbz~H-H-TPxT.
-
-
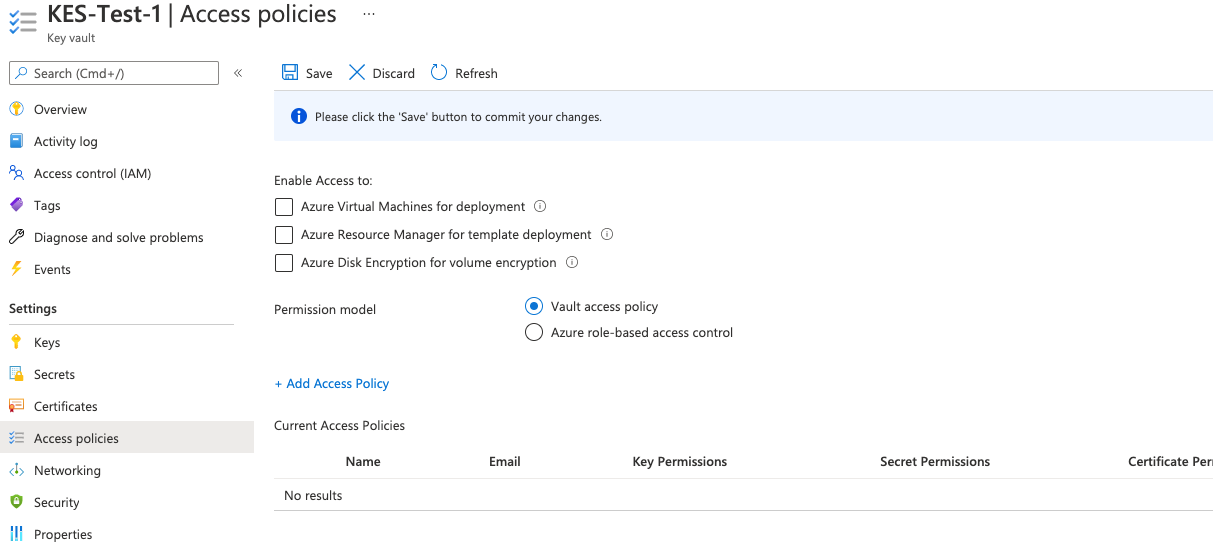
Add a Key Vault Policy
Navigate to the Key Vault Access policies tab and select Add Access Policy to create a Key Vault policy.
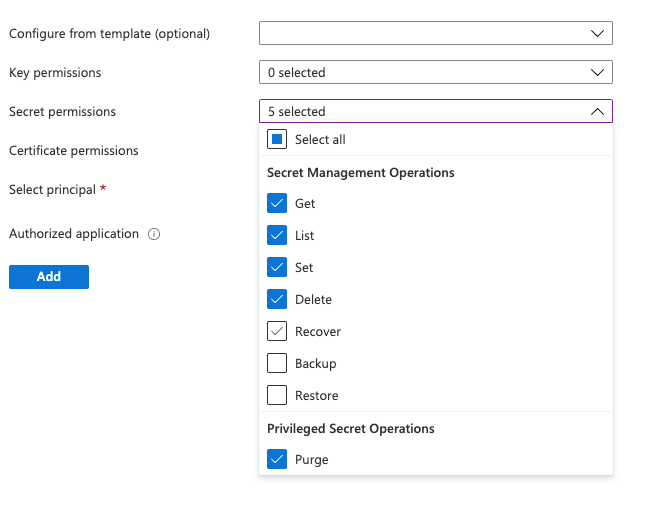
Define which Key Vault operations the KES Server can perform. Select the following five
Secret permissions:- Get
- List
- Set
- Delete
- Purge
-
Assign Policy to Principal
Select a principal or an authorized application.
If the application itself is the principal, no authorized application is required. Alternatively, select a user or group as principal and select the newly registered KES Azure application as the authorized application.
For this tutorial, we set the principal as the secret we added. Search for the name of the application (
KES-Demo) or add the Application ID.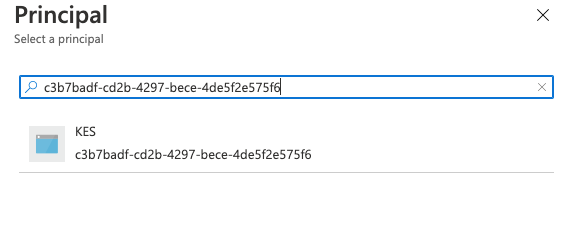
-
Policy Summary
Azure shows a new access policy associated to our registered KES application.
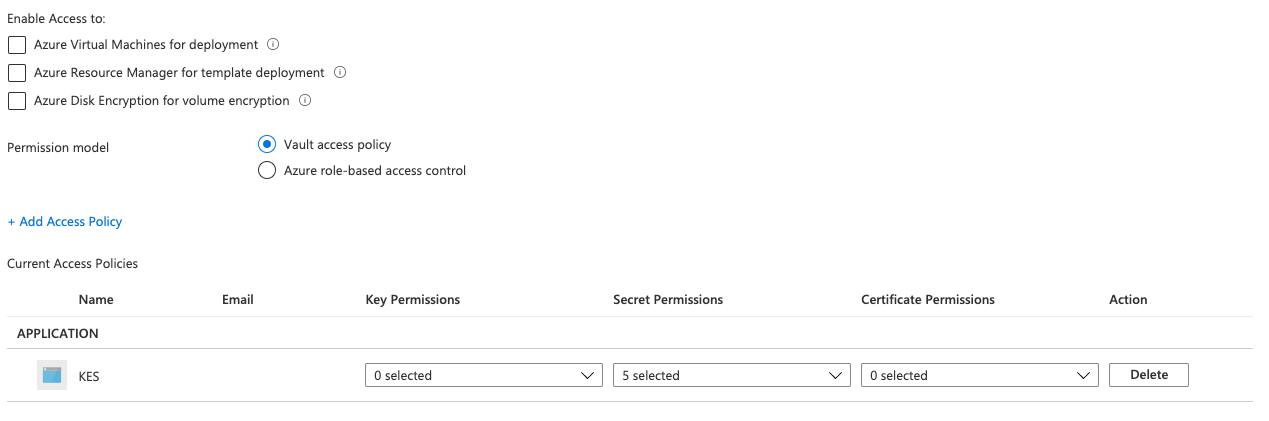 Make sure you Save before navigating elsewhere.
KES Server Setup
-
Generate KES Server Private Key & Certificate
The KES server need both a TLS private key and a certificate. A KES server is secure-by-default and can only run with TLS. This tutorial uses self-signed certificates for simplicity.
The following command generates a new TLS private key (
private.key) and a self-signed X.509 certificate (public.crt) issued for the IP127.0.0.1and DNS namelocalhost:$ kes identity new --ip "127.0.0.1" localhost Private key: private.key Certificate: public.crt Identity: 2e897f99a779cf5dd147e58de0fe55a494f546f4dcae8bc9e5426d2b5cd35680If you already have a TLS private key & certificate from WebPKI or an internal CA, you can use them instead. Remember to adjust thetlsconfig section. -
Generate Client Credentials
Use the following command to generate a new TLS private/public key pair for the client application to use to access the KES Server:
$ kes identity new --key=client.key --cert=client.crt MyApp

  Private key:  client.key
  Certificate:  client.crt
  Identity:     02ef5321ca409dbc7b10e7e8ee44d1c3b91e4bf6e2198befdebee6312745267b
The identity
02ef5321ca409dbc7b10e7e8ee44d1c3b91e4bf6e2198befdebee6312745267bis a unique fingerprint of the public key inclient.crt. You can re-compute the fingerprint at anytime:$ kes identity of client.crt Identity: 02ef5321ca409dbc7b10e7e8ee44d1c3b91e4bf6e2198befdebee6312745267b -
Configure the KES Server
Create the KES server configuration file:
config.yml. Make sure that the identity in the policy section matches yourclient.crtidentity.address: 0.0.0.0:7373 # Listen on all network interfaces on port 7373 admin: identity: disabled # We disable the admin identity since we don't need it in this guide tls: key: private.key # The KES server TLS private key cert: public.crt # The KES server TLS certificate policy: my-app: allow: - /v1/key/create/my-key* - /v1/key/generate/my-key* - /v1/key/decrypt/my-key* identities: - 02ef5321ca409dbc7b10e7e8ee44d1c3b91e4bf6e2198befdebee6312745267b # Use the identity of your client.crt keystore: azure: keyvault: endpoint: "https://kes-test-1.vault.azure.net" # Use your KeyVault instance endpoint. credentials: tenant_id: "" # The ID of the tenant the client belongs to - e.g: "41a37d4e-b3c4-49f4-b330-1114fb0271c8". client_id: "" # The ID of the client - e.g: "c3b7badf-cd2b-4297-bece-4de5f2e575f6". client_secret: "" # The value of the client secret - e.g: "-.j4XP6Sa7E39.KWn-SL~Dgbz~H-H-TPxT". -
Start the KES Server
Linux
kes server --config config.yml --auth offLinux Swap Protection:In Linux environments, KES can use the
mlocksyscall to prevent the OS from writing in-memory data to disk (swapping). This prevents leaking sensitive data.Use the following command to allow KES to use the
mlocksyscall without running withrootprivileges:sudo setcap cap_ipc_lock=+ep $(readlink -f $(which kes))Start a KES server instance with memory protection:
kes server --config config.yml --auth off --mlockContainers
The following instructions use Podman to manage the containers. You can also use Docker.
Modify addresses and file paths as needed for your deployment.
sudo podman pod create  \
  -p 9000:9000 -p 9001:9001 -p 7373:7373  \
  -v ~/minio-kes-azure/certs:/certs  \
  -v ~/minio-kes-azure/minio:/mnt/minio  \
  -v ~/minio-kes-azure/config:/etc/default/  \
  -n minio-kes-azure

sudo podman run -dt  \
  --cap-add IPC_LOCK  \
  --name kes-server  \
  --pod "minio-kes-azure"  \
  -e KES_SERVER=https://127.0.0.1:7373  \
  -e KES_CLIENT_KEY=/certs/kes-server.key  \
  -e KES_CLIENT_CERT=/certs/kes-server.cert  \
  quay.io/minio/kes:2024-01-11T13-09-29Z server  \
    --auth  \
    --config=/etc/default/kes-config.yaml  \

sudo podman run -dt  \
  --name minio-server  \
  --pod "minio-kes-azure"  \
  -e "MINIO_CONFIG_ENV_FILE=/etc/default/minio"  \
  quay.io/minio/minio:RELEASE.2024-01-31T20-20-33Z server  \
    --console-address ":9001"
You can verify the status of the containers using the following command. The command should show three pods, one for the Pod, one for KES, and one for MinIO.
sudo podman container list
KES CLI Access
-
Set
KES_SERVEREndpointThe following environment variable specifies the server the KES CLI should talk to:
export KES_SERVER=https://127.0.0.1:7373 -
Define the Client Credentials
The following environment variables set the access credentials the client uses to talk to a KES server:
export KES_CLIENT_CERT=client.crtexport KES_CLIENT_KEY=client.key -
Test the Configuration
Perform any API operation allowed by the policy we assigned above.
For example, create a key:
kes key create my-key-1Use the key to generate a new data encryption key:
kes key dek my-key-1The result resembles the following:
{
  plaintext : UGgcVBgyQYwxKzve7UJNV5x8aTiPJFoR+s828reNjh0=
  ciphertext: eyJhZWFkIjoiQUVTLTI1Ni1HQ00tSE1BQy1TSEEtMjU2IiwiaWQiOiIxMTc1ZjJjNDMyMjNjNjNmNjY1MDk5ZDExNmU3Yzc4NCIsIml2IjoiVHBtbHpWTDh5a2t4VVREV1RSTU5Tdz09Iiwibm9uY2UiOiJkeGl0R3A3bFB6S21rTE5HIiwiYnl0ZXMiOiJaaWdobEZrTUFuVVBWSG0wZDhSYUNBY3pnRWRsQzJqWFhCK1YxaWl2MXdnYjhBRytuTWx0Y3BGK0RtV1VoNkZaIn0=
}
Using KES with a MinIO Server
MinIO Server requires KES to enable server-side data encryption.
See the KES for MinIO instruction guide for additional steps needed to use your new KES Server with a MinIO Server.
Configuration References
The following section describes the Key Encryption Service (KES) configuration settings to use Azure Key Vault as the root KMS to store external keys, such as the keys used for Server-Side Encryption on a MinIO Server.