Deploy MinIO: Multi-Node Multi-Drive
The procedures on this page cover deploying MinIO in a Multi-Node Multi-Drive (MNMD) or “Distributed” configuration. MNMD deployments provide enterprise-grade performance, availability, and scalability and are the recommended topology for all production workloads.
MNMD deployments support erasure coding configurations which tolerate the loss of up to half the nodes or drives in the deployment while continuing to serve read operations. Use the MinIO Erasure Code Calculator when planning and designing your MinIO deployment to explore the effect of erasure code settings on your intended topology.
Prerequisites
Networking and Firewalls
Each node should have full bidirectional network access to every other node in
the deployment. For containerized or orchestrated infrastructures, this may
require specific configuration of networking and routing components such as
ingress or load balancers. Certain operating systems may also require setting
firewall rules. For example, the following command explicitly opens the default
MinIO server API port 9000 for servers running firewalld :
firewall-cmd --permanent --zone=public --add-port=9000/tcp
firewall-cmd --reload
All MinIO servers in the deployment must use the same listen port.
If you set a static MinIO Console port (e.g. :9001)
you must also grant access to that port to ensure connectivity from external
clients.
MinIO strongly recomends using a load balancer to manage connectivity to the cluster. The Load Balancer should use a “Least Connections” algorithm for routing requests to the MinIO deployment, since any MinIO node in the deployment can receive, route, or process client requests.
The following load balancers are known to work well with MinIO:
Configuring firewalls or load balancers to support MinIO is out of scope for this procedure. The Configure NGINX Proxy for MinIO Server reference provides a baseline configuration for using NGINX as a reverse proxy with basic load balancing configured.
Sequential Hostnames
MinIO requires using expansion notation {x...y} to denote a sequential series of MinIO hosts when creating a server pool.
MinIO supports using either a sequential series of hostnames or IP addresses to represent each minio server process in the deployment.
This procedure assumes use of sequential hostnames due to the lower overhead of management, especially in larger distributed clusters.
Create the necessary DNS hostname mappings prior to starting this procedure. For example, the following hostnames would support a 4-node distributed deployment:
minio-01.example.comminio-02.example.comminio-03.example.comminio-04.example.com
You can specify the entire range of hostnames using the expansion notation minio-0{1...4}.example.com.
Non-Sequential Hostnames or IP Addresses
MinIO does not support non-sequential hostnames or IP addresses for distributed deployments.
You can instead use /etc/hosts on each node to set a simple DNS scheme that supports expansion notation.
For example:
# /etc/hosts

198.0.2.10    minio-01.example.net
198.51.100.3  minio-02.example.net
198.0.2.43    minio-03.example.net
198.51.100.12 minio-04.example.net
The above hosts configuration supports expansion notation of minio-0{1...4}.example.net, mapping the sequential hostnames to the desired IP addresses.
Storage Requirements
The following requirements summarize the Storage section of MinIO’s hardware recommendations:
- Use Local Storage
Direct-Attached Storage (DAS) has significant performance and consistency advantages over networked storage (NAS, SAN, NFS). MinIO strongly recommends flash storage (NVMe, SSD) for primary or “hot” data.
- Use XFS-Formatting for Drives
MinIO strongly recommends provisioning XFS formatted drives for storage. MinIO uses XFS as part of internal testing and validation suites, providing additional confidence in performance and behavior at all scales.
MinIO does not test nor recommend any other filesystem, such as EXT4, BTRFS, or ZFS.
- Use Consistent Type of Drive
MinIO does not distinguish drive types and does not benefit from mixed storage types. Each pool must use the same type (NVMe, SSD)
For example, deploy a pool consisting of only NVMe drives. If you deploy some drives as SSD or HDD, MinIO treats those drives identically to the NVMe drives. This can result in performance issues, as some drives have differing or worse read/write characteristics and cannot respond at the same rate as the NVMe drives.
- Use Consistent Size of Drive
MinIO limits the size used per drive to the smallest drive in the deployment.
For example, deploy a pool consisting of the same number of NVMe drives with identical capacity of
7.68TiB. If you deploy one drive with3.84TiB, MinIO treats all drives in the pool as having that smaller capacity.- Configure Sequential Drive Mounting
MinIO uses Go expansion notation
{x...y}to denote a sequential series of drives when creating the new deployment, where all nodes in the deployment have an identical set of mounted drives. Configure drive mounting paths as a sequential series to best support this notation. For example, mount your drives using a pattern of/mnt/drive-n, wherenstarts at1and increments by1per drive.- Persist Drive Mounting and Mapping Across Reboots
Use
/etc/fstabto ensure consistent drive-to-mount mapping across node reboots.Non-Linux Operating Systems should use the equivalent drive mount management tool.
Memory Requirements
Changed in version RELEASE.2024-01-28T22-35-53Z: MinIO pre-allocates 2GiB of system memory at startup.
MinIO recommends a minimum of 32GiB of memory per host. See Memory for more guidance on memory allocation in MinIO.
Time Synchronization
Multi-node systems must maintain synchronized time and date to maintain stable internode operations and interactions.
Make sure all nodes sync to the same time server regularly.
Operating systems vary for methods used to synchronize time and date, such as with ntp, timedatectl, or timesyncd.
Check the documentation for your operating system for how to set up and maintain accurate and identical system clock times across nodes.
Considerations
Erasure Coding Parity
MinIO erasure coding is a data redundancy and availability feature that allows MinIO deployments to automatically reconstruct objects on-the-fly despite the loss of multiple drives or nodes in the cluster.
MinIO defaults to EC:4, or 4 parity blocks per erasure set.
You can set a custom parity level by setting the appropriate MinIO Storage Class environment variable.
Consider using the MinIO Erasure Code Calculator for guidance in selecting the appropriate erasure code parity level for your cluster.
Important
While you can change erasure parity settings at any time, objects written with a given parity do not automatically update to the new parity settings.
Capacity-Based Planning
MinIO recommends planning storage capacity sufficient to store at least 2 years of data before reaching 70% usage. Performing server pool expansion more frequently or on a “just-in-time” basis generally indicates an architecture or planning issue.
For example, consider an application suite expected to produce at least 100 TiB of data per year and a 3 year target before expansion. By ensuring the deployment has ~500TiB of usable storage up front, the cluster can safely meet the 70% threshold with additional buffer for growth in data storage output per year.
Since MinIO erasure coding requires some storage for parity, the total raw storage must exceed the planned usable capacity. Consider using the MinIO Erasure Code Calculator for guidance in planning capacity around specific erasure code settings.
Recommended Operating Systems
This tutorial assumes all hosts running MinIO use a recommended Linux operating system such as RHEL8+ or Ubuntu 18.04+.
Pre-Existing Data
When starting a new MinIO server in a distributed environment, the storage devices must not have existing data.
Once you start the MinIO server, all interactions with the data must be done through the S3 API. Use the MinIO Client, the MinIO Console, or one of the MinIO Software Development Kits to work with the buckets and objects.
Warning
Modifying files on the backend drives can result in data corruption or data loss.
Deploy Distributed MinIO
The following procedure creates a new distributed MinIO deployment consisting of a single Server Pool.
All commands provided below use example values. Replace these values with those appropriate for your deployment.
Review the Prerequisites before starting this procedure.
1) Install the MinIO Binary on Each Node
The following tabs provide examples of installing MinIO onto 64-bit Linux operating systems using RPM, DEB, or binary.
The RPM and DEB packages automatically install MinIO to the necessary system paths and create a minio service for systemctl.
MinIO strongly recommends using the RPM or DEB installation routes.
To update deployments managed using systemctl, see Update systemctl-Managed MinIO Deployments.
amd64 (Intel or AMD 64-bit processors)
Use one of the following options to download the MinIO server installation file for a machine running Linux on an Intel or AMD 64-bit processor.
Use the following commands to download the latest stable MinIO RPM and install it.
wget https://dl.min.io/server/minio/release/linux-amd64/archive/minio-20240406052602.0.0-1.x86_64.rpm -O minio.rpm
sudo dnf install minio.rpm
Use the following commands to download the latest stable MinIO DEB and install it:
wget https://dl.min.io/server/minio/release/linux-amd64/archive/minio_20240406052602.0.0_amd64.deb -O minio.deb
sudo dpkg -i minio.deb
Use the following commands to download the latest stable MinIO binary and
install it to the system $PATH:
wget https://dl.min.io/server/minio/release/linux-amd64/minio
chmod +x minio
sudo mv minio /usr/local/bin/
arm64 (Apple M1/M2 or other ARM 64-bit processors)
Use one of the following options to download the MinIO server installation file for a machine running Linux on an ARM 64-bit processor, such as the Apple M1 or M2.
Use the following commands to download the latest stable MinIO RPM and install it.
wget https://dl.min.io/server/minio/release/linux-arm64/archive/minio-20240406052602.0.0-1.aarch64.rpm -O minio.rpm
sudo dnf install minio.rpm
Use the following commands to download the latest stable MinIO DEB and install it:
wget https://dl.min.io/server/minio/release/linux-arm64/archive/minio_20240406052602.0.0_arm64.deb -O minio.deb
sudo dpkg -i minio.deb
Use the following commands to download the latest stable MinIO binary and
install it to the system $PATH:
wget https://dl.min.io/server/minio/release/linux-arm64/minio
chmod +x minio
MINIO_ROOT_USER=admin MINIO_ROOT_PASSWORD=password ./minio server /mnt/data --console-address ":9001"
Other Architectures
MinIO also supports additional architectures:
ppc64le
s390x
For instructions to download the binary, RPM, or DEB files for those architectures, see the MinIO download page.
2) Create the systemd Service File
The .deb or .rpm packages install the following systemd service file to /usr/lib/systemd/system/minio.service.
For binary installations, create this file manually on all MinIO hosts.
Note
systemd checks the /etc/systemd/... path before checking the /usr/lib/systemd/... path and uses the first file it finds.
To avoid conflicting or unexpected configuration options, check that the file only exists at the /usr/lib/systemd/system/minio.service path.
Refer to the man page for systemd.unit for details on the file path search order.
[Unit]
Description=MinIO
Documentation=https://min.io/docs/minio/linux/index.html
Wants=network-online.target
After=network-online.target
AssertFileIsExecutable=/usr/local/bin/minio

[Service]
WorkingDirectory=/usr/local

User=minio-user
Group=minio-user
ProtectProc=invisible

EnvironmentFile=-/etc/default/minio
ExecStartPre=/bin/bash -c "if [ -z \"${MINIO_VOLUMES}\" ]; then echo \"Variable MINIO_VOLUMES not set in /etc/default/minio\"; exit 1; fi"
ExecStart=/usr/local/bin/minio server $MINIO_OPTS $MINIO_VOLUMES

# MinIO RELEASE.2023-05-04T21-44-30Z adds support for Type=notify (https://www.freedesktop.org/software/systemd/man/systemd.service.html#Type=)
# This may improve systemctl setups where other services use `After=minio.server`
# Uncomment the line to enable the functionality
# Type=notify

# Let systemd restart this service always
Restart=always

# Specifies the maximum file descriptor number that can be opened by this process
LimitNOFILE=65536

# Specifies the maximum number of threads this process can create
TasksMax=infinity

# Disable timeout logic and wait until process is stopped
TimeoutStopSec=infinity
SendSIGKILL=no

[Install]
WantedBy=multi-user.target

# Built for ${project.name}-${project.version} (${project.name})
The minio.service file runs as the minio-user User and Group by default.
You can create the user and group using the groupadd and useradd
commands. The following example creates the user, group, and sets permissions
to access the folder paths intended for use by MinIO. These commands typically
require root (sudo) permissions.
groupadd -r minio-user
useradd -M -r -g minio-user minio-user
chown minio-user:minio-user /mnt/disk1 /mnt/disk2 /mnt/disk3 /mnt/disk4
The specified drive paths are provided as an example. Change them to match the path to those drives intended for use by MinIO.
Alternatively, change the User and Group values to another user and
group on the system host with the necessary access and permissions.
MinIO publishes additional startup script examples on github.com/minio/minio-service.
To update deployments managed using systemctl, see Update systemctl-Managed MinIO Deployments.
3) Create the Service Environment File
Create an environment file at /etc/default/minio. The MinIO
service uses this file as the source of all
environment variables used by
MinIO and the minio.service file.
The following examples assumes that:
The deployment has a single server pool consisting of four MinIO server hosts with sequential hostnames.
minio1.example.com   minio3.example.com
minio2.example.com   minio4.example.com
All hosts have four locally-attached drives with sequential mount-points:
/mnt/disk1/minio   /mnt/disk3/minio
/mnt/disk2/minio   /mnt/disk4/minio
The deployment has a load balancer running at
https://minio.example.netthat manages connections across all four MinIO hosts.
Modify the example to reflect your deployment topology:
# Set the hosts and volumes MinIO uses at startup
# The command uses MinIO expansion notation {x...y} to denote a
# sequential series.
#
# The following example covers four MinIO hosts
# with 4 drives each at the specified hostname and drive locations.
# The command includes the port that each MinIO server listens on
# (default 9000)

MINIO_VOLUMES="https://minio{1...4}.example.net:9000/mnt/disk{1...4}/minio"

# Set all MinIO server options
#
# The following explicitly sets the MinIO Console listen address to
# port 9001 on all network interfaces. The default behavior is dynamic
# port selection.

MINIO_OPTS="--console-address :9001"

# Set the root username. This user has unrestricted permissions to
# perform S3 and administrative API operations on any resource in the
# deployment.
#
# Defer to your organizations requirements for superadmin user name.

MINIO_ROOT_USER=minioadmin

# Set the root password
#
# Use a long, random, unique string that meets your organizations
# requirements for passwords.

MINIO_ROOT_PASSWORD=minio-secret-key-CHANGE-ME

# Set to the URL of the load balancer for the MinIO deployment
# This value *must* match across all MinIO servers. If you do
# not have a load balancer, set this value to to any *one* of the
# MinIO hosts in the deployment as a temporary measure.
MINIO_SERVER_URL="https://minio.example.net:9000"
You may specify other environment variables or server commandline options as required by your deployment. All MinIO nodes in the deployment should include the same environment variables with the same values for each variable.
4) Add TLS/SSL Certificates
MinIO enables Transport Layer Security (TLS) 1.2+
automatically upon detecting a valid x.509 certificate (.crt) and
private key (.key) in the MinIO ${HOME}/.minio/certs directory.
For systemd-managed deployments, use the $HOME directory for the
user which runs the MinIO server process. The provided minio.service
file runs the process as minio-user. The previous step includes instructions
for creating this user with a home directory /home/minio-user.
Place TLS certificates into
/home/minio-user/.minio/certson each host.If any MinIO server or client uses certificates signed by an unknown Certificate Authority (self-signed or internal CA), you must place the CA certs in the
/home/minio-user/.minio/certs/CAson all MinIO hosts in the deployment. MinIO rejects invalid certificates (untrusted, expired, or malformed).
If the minio.service file specifies a different user account, use the
$HOME directory for that account. Alternatively, specify a custom
certificate directory using the minio server --certs-dir
commandline argument. Modify the MINIO_OPTS variable in
/etc/defaults/minio to set this option. The systemd user which runs the
MinIO server process must have read and listing permissions for the specified
directory.
For more specific guidance on configuring MinIO for TLS, including multi-domain support via Server Name Indication (SNI), see Network Encryption (TLS). You can optionally skip this step to deploy without TLS enabled. MinIO strongly recommends against non-TLS deployments outside of early development.
5) Run the MinIO Server Process
Issue the following commands on each node in the deployment to start the MinIO service:
sudo systemctl start minio.service
Use the following commands to confirm the service is online and functional:
sudo systemctl status minio.service
journalctl -f -u minio.service
MinIO may log an increased number of non-critical warnings while the server processes connect and synchronize. These warnings are typically transient and should resolve as the deployment comes online.
Changed in version RELEASE.2023-02-09T05-16-53Z: MinIO starts if it detects enough drives to meet the write quorum for the deployment.
If any drives remain offline after starting MinIO, check and cure any issues blocking their functionality before starting production workloads.
The MinIO service does not automatically start on host reboot.
You must use systemctl enable minio.service to start the process as part of the host boot.
sudo systemctl enable minio.service
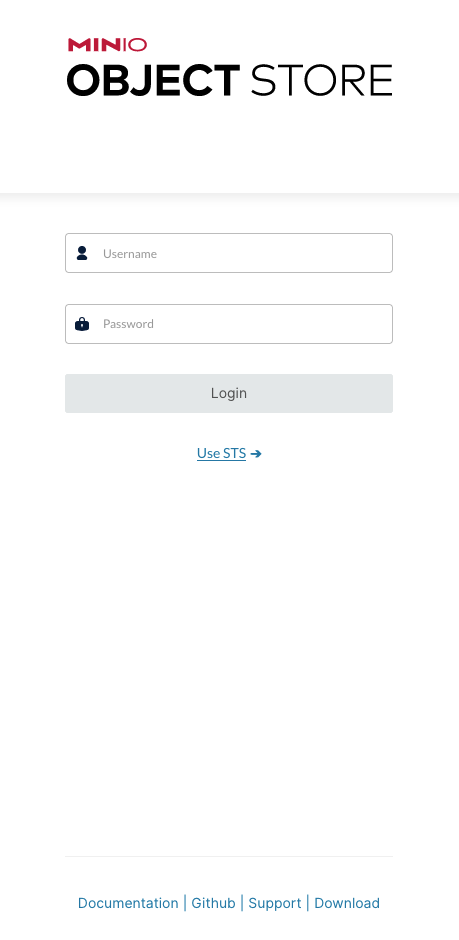
6) Open the MinIO Console
Open your browser and access any of the MinIO hostnames at port :9001 to
open the MinIO Console login page. For example,
https://minio1.example.com:9001.
Log in with the MINIO_ROOT_USER and MINIO_ROOT_PASSWORD from the previous step.
You can use the MinIO Console for general administration tasks like Identity and Access Management, Metrics and Log Monitoring, or Server Configuration. Each MinIO server includes its own embedded MinIO Console.